
 Author:
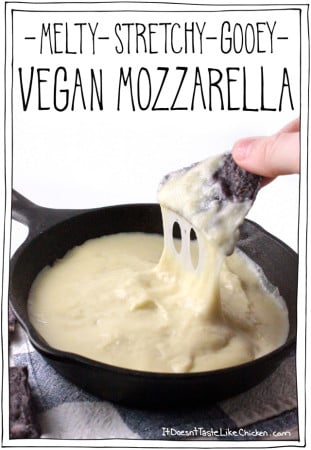
 Ok friends, this is it. After all of the love for my Melty Stretchy Gooey Vegan Mozzarella, it's time for a follow-up act: Melty Stretchy Gooey Vegan Nacho Cheese. (I know, I am just so incredibly original with the new name).
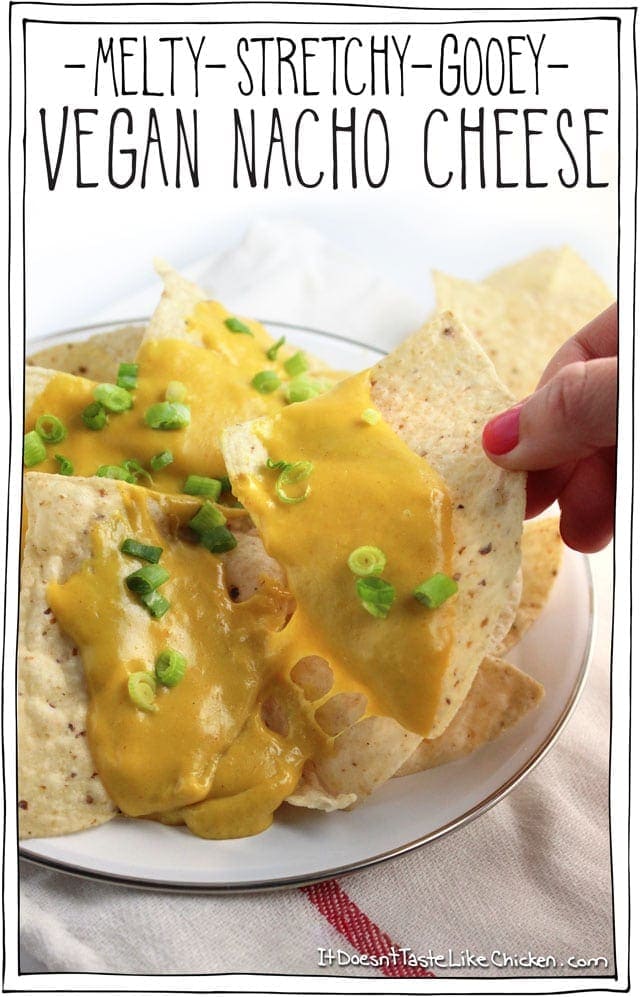
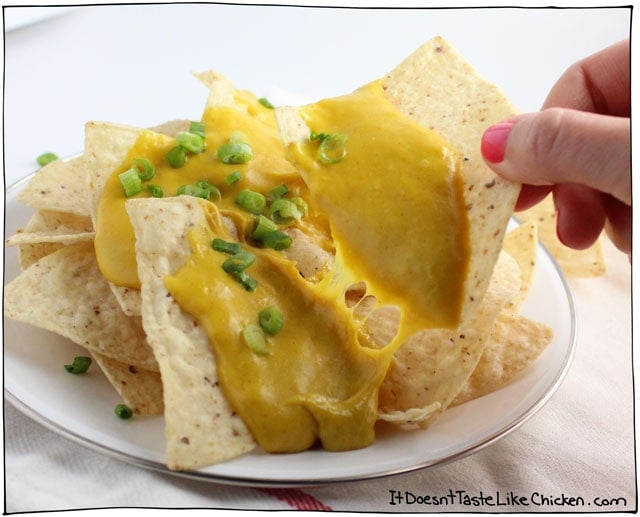
With the help of reader Amanda (hi Amanda!), I toyed around with different spices and flavours to achieve a cheddar-like cheese recipe. No small task, especially when you don't eat cow's milk cheddar to compare. With a little zing and zang, salty and sweet, ooey and gooey, I managed to achieve... are you ready for it?...nacho heaven. Big plate of nachos featuring Vegan Nacho Cheese! Hello again, Nachos. Oh, how I missed you. Now I will devour you!
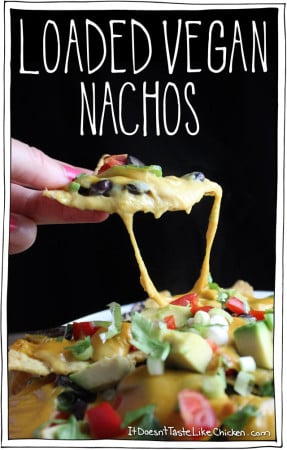
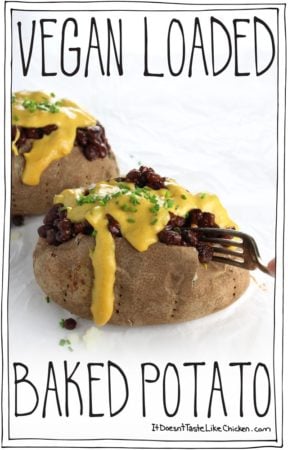
This recipe is good for more than just nachos. You can load up a baked potato, make a grilled cheese, layer on a veggie patty for a melty cheeseburger, or stir into noodles for quick mac and cheese. Anywhere that you would use melted cheddar cheese, you can now use this recipe.
Do you want more good news? Of course you do. It's oil, gluten, and dairy free, only 150 calories per serving, omnivores love it, over 10 grams of protein, 5 grams of fiber, and only 15 minutes to make. Vegan high fives all around!

Can we see another shot of this ooey, gooey, melty-ness. Ahhh.... there we go.
Notes about this cheese:
- You have to use tapioca starch (also called tapioca flour). Corn starch, potato starch or any other starch won't have the same stretchy quality. If you can't find tapioca starch in your grocery store, you can always order it online here. If you have tapioca pearls, you can use a coffee grinder or a high powered blender to grind them into a homemade batch of tapioca starch.
- You can store the leftover cheese in an airtight container in the fridge and it should last for several days. This cheese will never turn into a solid block. It will always remain in a melty state. If you want to return the cold nacho cheese back to dipping consistency, reheat over medium heat while stirring constantly so it doesn't burn. Once it is hot and bubbling it might have thickened up too much. You can thin it out by adding a tablespoon of water at a time, stirring it in until desired consistency is reached.
- Please beware, once you make a batch, you will probably eat the whole thing in one sitting. Don't say I didn't warn you!

To make this nacho cheese, first start by soaking the cashews for four hours or overnight. OR if you need to eat this immediately (and I always do), you can skip the soaking, and instead boil the cashews for 10 minutes until soft and tender, then drain before using. Sneaky deaky cashew softening trick.
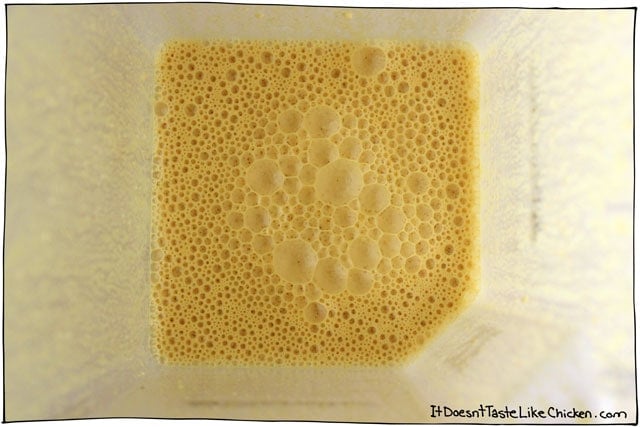
Toss all the ingredients into a blender and blend until completely smooth. It will be very watery, don't worry, it will get cheesy!
If you don't have a high powered blender, you may want to pour the liquid through a fine mesh strainer or cheesecloth into the pot to remove any cashew bits that didn't grind up. This will ensure a smooth cheese texture.

Put the pan over medium-high heat. Stir to keep anything from burning. You will start to see clumps forming.
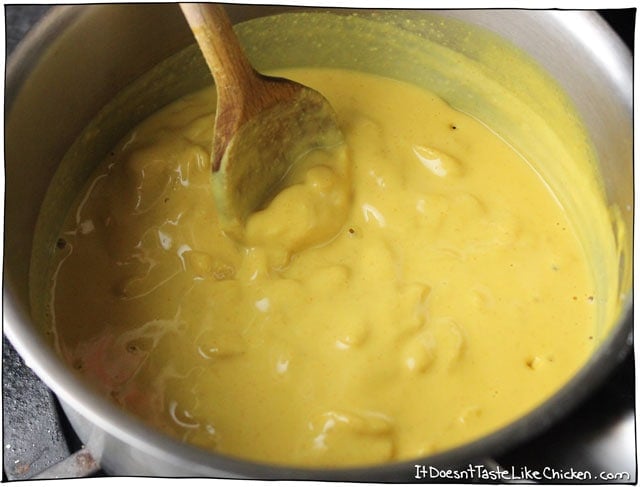
Ooo clumpy. Keep stirring!
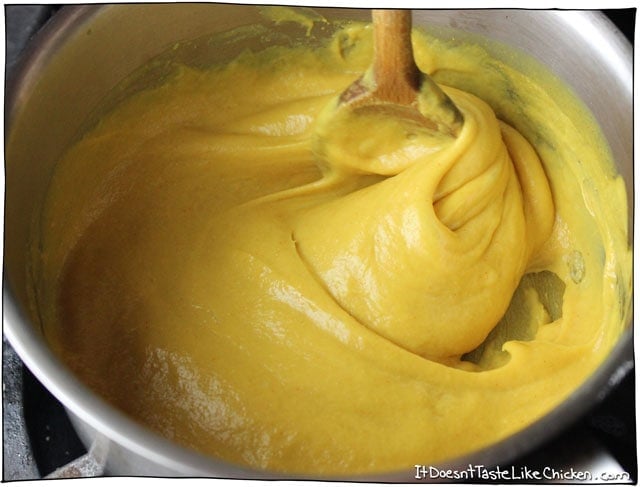
Then all of a sudden, magic! Everything comes together and makes this cheesy, melty, deliciousness. Keep stirring and cooking for another minute or two, to make sure it's finished firming up. It should take about 5 minutes to cook total. That's it! Done. So easy.
(click stars to vote)
Melty Stretchy Gooey Vegan Nacho Cheese
Servings:
PRINT
PIN
Video
COMMENT
Ingredients
- ½ cup raw cashews, (see notes)
- 1 cup water
- 3 tablespoons tapioca starch, (also called tapioca flour)
- 3 tablespoons nutritional yeast
- 2 tablespoons lemon juice
- 1 ½ teaspoons salt, (or to taste)
- 1 ½ teaspoons white miso paste
- 1 teaspoon paprika
- 1 teaspoon maple syrup or agave
- ½ teaspoon onion powder
- ¼ teaspoon ground turmeric
- ¼ teaspoon garlic powder
Instructions
- To soften the cashews: Boil them for 10 minutes until soft. OR soak the cashews for four hours or overnight. Drain before using.
- To make the nacho vegan nacho cheese: Add the softened cashews, water, and all the remaining ingredients to a blender, and blend until smooth. It will be very watery.
- Pour into a small saucepan and heat over medium-high heat, while stirring. If you don't have a high-powered blender, you may want to pour the liquid through a fine mesh strainer or cheesecloth into the pot, to remove any cashew bits that didn't grind up. This will ensure a smooth cheese texture. As you stir it will start forming clumps, and then all of a sudden it will become a cheesy gooey mass of yumminess. This takes about 5 minutes. Continue to cook and stir for an additional minute or two to make sure it has firmed up completely.
Notes
Nutrition
⭐ Did You Make This Recipe?
I’d love if you left a rating and comment, it helps others find the recipe and makes my day! 💕Bon appetegan!
Sam.
Rita S says
I have made this twice in 24 hours. We love it. Since I don't have a high speed blender, just a regular Kitchen-Aid blender. I boiled the cashews 10 minutes longer.. hoping that would make them softer.. they blended up quite easily.. also my gang is not a fan of Nutritional Yeast so I cut it down to 2 tablespoons. We did not have miso in the house so I made it without. It turned out so well.. THEY LOVE IT and I do too. My husband and 15 year old are the biggest fans. I just added your cookbook to my holiday wishlist. Thanks so much for sharing this recipe with the world.. it is a real winner.
Sam Turnbull says
Awesome!!!
Hazel says
I did some modifications: subbed (1 1/2 t) vegan lactic acid for the lemon juice, added a jar of pimentos with juice to the blended ingredients, and added a small can of of herdez salsa at the end. Super delicious! I’m going to fake out my office with this for our annual nacho bar along with the bbq jackfruit. Thanks for another great recipe!
Sam Turnbull says
Awesome!
John says
What are your suggestions for using this recipe in a baked vegetable pasta dish? Would you advise poring the cheese once blended into the baking dish and allowing it to naturally thicken?
Sam Turnbull says
I would recommend preparing the cheese fully and then using it. If you want to make the cheese a bit runnier just add more water. Enjoy!
Curt says
This was fantastic! First time using Miso paste and everything came out great! I used the recipe with 1/4 cup of cashews and will probably do the 1/2 cup next time as this was a bit more gooey than I think I ultimately would like but still delicious and a crowd pleaser.
I used this with my modification of your baked tofu bites and in a mexican bowl. Delicious!
Sam Turnbull says
Aww yay! Thrilled you enjoyed it so much, Curt 🙂
Kate says
Sam, this was great! We didn’t have a high powered food processor, so it wasn’t as smooth, and we didn’t have miso paste on hand, but still super delish! My 10 year old picky eater even like her “fake nachos!”
Isabel says
loved it! added a bit more water because I like the cheese to be a bit more creamy rather than gooey but otherwise I really enjoyed it.
Sam Turnbull says
So happy you enjoyed it, Isabel!
Mary says
Tastes like nutritional yeast to me, recipe was easy enough to make, just not cheesy to me. I will eat the rest, but was hoping for more of a cheese taste. Maybe I will like it more once it chills. I'm making your scalloped potatoes tomorrow but I won't put the cheese on top. My mom made scalloped potatoes growing up and I loved it, she never put cheese on top. Actually we rarely ate any type of cheese growing up, the odd slice of cheese on a burger. This is my 2nd recipe for vegan cheese sauce, so far just not a favorite for me. The 1st recipe had a bite because it used liquid smoke, but didn't enjoy it enough to make again. Oh well, can't all be winners lol
Sam Turnbull says
Hi Mary, sorry you didn't enjoy it more. Just wanted to check that you used all the ingredients and measured them correctly? I ask because there are only 3 tablespoons of nutritional yeast along with lots of lemon juice, miso paste, and other spices which together make for a very cheesy taste.
Mary says
Yes, used and measured all ingredients correctly. Since I'm pretty new to wfpb, I think my taste buds haven't changed enough to accept nutritional yeast as being cheese flavored. Here's an example, I haven't eaten mystery meat hotdogs in at least 15 years, I tried vegan hotdogs a couple months ago and I love them. I find zero difference, maybe for someone who has eaten a mystery meat hotdog not that long ago, might not have the same tasting experience as me. I did finish the cheese sauce in 3 days lol I think for now I will hold off on the vegan cheese, maybe try it again in a month or 2.
Sam Turnbull says
Haha, I love that story. Yes that makes sense. I remember when I first went vegan I didn't like the taste of nutritional yeast. Now I love sprinkling it all over my popcorn. Sorry you didn't enjoy my recipe more!
Bethany says
Don't worry Mary and don't give up on nutritional yeast. I promise you- your tastebuds will change and you will think it is the best thing ever! I haven't had real cheese in almost 2 years. I actually didn't make anything that resembled the foods I used to make until close to the year mark and now when I make recipes like this amazing one- they taste like heaven.
Angie Moreno says
Hi Sam,
Will it be okay if I use non-pasteurized strong hatcho miso? It's a dark miso and it's the one I have right now.
Lots of vegan love
Angie from Spain
Sam Turnbull says
Hi Angie, I'm sure that would work fine although the taste and colour might vary slightly. Enjoy!
Margaret says
This was wonderful as a melted cheese sandwich--thank you! I miss daily cheese only for the calcium. Can you tell me how you get enough in your diet? I don't like to take calcium supplements, so doubt I may be even close to the daily amount recommended.
Margaret says
I meant "dairy" cheese; not "daily" 🙂
Sam Turnbull says
Hi Margaret, glad you enjoyed! I always recommend NutritionFacts.org for any nutrition questions. The best sources of calcium are dark leafy greens such as kale and broccoli. You can read more here.
Kristine says
I don’t love the vegan cheese options in the grocery store so I was super excited to try this. It’s really yummy. I ate it on crackers and it was delicious. My boyfriend thought it tasted like the spray cheese we ate as kids. Thank you!
Sam Turnbull says
Haha! Awesome! So happy you enjoyed it, Kristine 🙂
Jessica says
Hi!
I absolutely LOVE your recipes! I just made this for my 4 year old....he actually helped me make it. He loved putting all of the toppings on himself. We had a big gooey mess, but it was a yummy mess! I have one question regarding the nacho cheese. I went with the cookbook version of the recipe and I found the cheese to be a little unmanageable to spread on the nachos. What am I doing wrong? It came on in globs (yummy globs), rather than pouring out like in your video. Can you help? Thanks so much!
Sam Turnbull says
So happy you enjoyed it, Jessica! You probably just cooked yours a little longer which would continue to thicken it up. No worries tho, you can always just mix in more water to reach the desired consistency. Hope that helps!
Windy says
How does this recipe compare with the NACHO CHEESE LOVE found in your Fuss-Free Vegan cookbook? Is one just a newer adaptation of the other, or is one better for certain things over the other? Appreciate your insight.
Sam Turnbull says
The one in my cookbook is the newer version, both are great tho. Enjoy!
Joe says
My review: Damn good!
Sam Turnbull says
Best review yet! Haha!
Lorinda Johnson says
Hi, is the Nutrition information per serving or whole recipe? These sound delicious! 🙂
Sam Turnbull says
Per serving. Enjoy!
Windwardsunny says
Omg this is delicious! The recipe is spot on. I can’t believe this is vegan cheese . This was great with chips! Can’t wait to have others snack on some. Thanks for the quick easy yummy recipe!
Sam Turnbull says
You're most welcome, Windwardsunny! SO happy you enjoyed it 🙂
Shari says
Oops! Forgot to mention in my previous comment that I reduced the salt by half!
Shari says
Sam, you are the best!
I used to make a chili con queso dip pre plant based days that was always a party hit. I decided to try making this tonight using your cheezy dip as my base. It was fantastic!!! I made a double batch of your recipe, but omitted 1 teaspoon of agave and reduced the lemon juice by 1-1/2 teaspoons. I added a 10 oz. can of Rotel brand diced tomatoes with green chiles, whole cumin seed, chili powder, dry mustard and some tobasco sauce. It was so close to the original I was amazed. Chili con queso dip is back on the menu now! 🙂
Sam Turnbull says
Amazing!! So thrilled you enjoyed it, Shari 🙂
Darlene says
I never eat maple syrup, so i used brown rice syrup instead, and it was incredible!
Thanks so much!
Sam Turnbull says
Wonderful! Thrilled you enjoyed it so much, Darlene 🙂
Amanda says
Made this tonight for nachos and it was sooo good. Super easy recipe. First time at making a homeade cheese and it was Incredible. I’m making the mozzarella tomorrow. Looking forward to spending less money on Daiya haha. Thanks for the great recipe.
Sam Turnbull says
Wonderful! So thrilled you loved it, Amanda 🙂
Linda Melgoza says
Hi just a quick question about the nutritional stats - the numbers given in the description at top of recipe are very different from the ones listed at the bottom as stats. Which one is more accurate?
Sam Turnbull says
Apologies, the nutritional info has been updated now, and is for one serving of the cheese (1/4 of the recipe).
Debbie says
I made this and it tasted so good. I didn't have white miso so used the other. It still tasted good.. I think next time I won't put quite so much salt, but all that being said it was soooooooo good
Sam Turnbull says
So happy you enjoyed it, Debbie 🙂